Factory-direct steel gratings & stair treads, shipped worldwide
Grating Load Table
Factory load table support. Charts, specs and drawings, free.
The table sheet for our real bar range arrives with your 24-hour quote · Free drawing review included
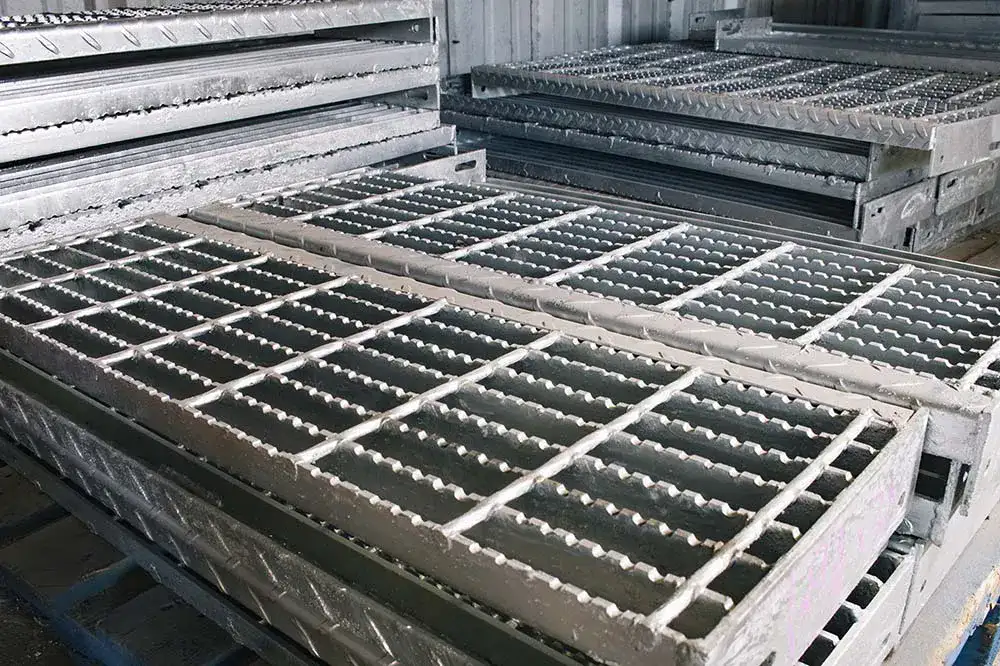
3,000 ㎡ workshop, 4 product lines
Data checked against bars we actually weld
Certified & tested
Reports on request, MTC with every order
Quote within 24 hours
Load table sheet and bar-size advice included
FOB Tianjin
Factory-direct worldwide, EXW / CIF negotiable
The format, not a fixed sheet
What a Grating Load Table Is — Rows, Columns, Cells
Every steel grating load capacity chart, whatever the series or the market, is built on the same skeleton. Learn the skeleton once and you can read any table — including ours, which we compile for the bars we actually weld and send with your quote rather than publishing as blanket numbers.
Rows are spans
The clear distance between supports, measured along the bearing bars. The row you start from is your support spacing — never the panel length.
Columns are bar sections
Depth × thickness of the bearing bar, grouped by bar spacing. Deeper bars gain capacity fastest; spacing decides how many bars share the load.
Cells are allowable loads
One value per span-and-section pair, in two families: uniformly distributed load and concentrated load. Both must pass — not just the bigger one.
The footnote is the basis
A deflection limit, stated as a fraction of the span. Change the basis and every cell in the sheet changes with it — this line is the table's honesty clause.
How a steel grating load table is laid out
| Table element | What it fixes | What to check before you trust it |
|---|---|---|
| Row axis = span | Clear distance between supports, along the bearing bars | An overhang does not count; measure steel-to-steel |
| Column axis = bar section | Depth × thickness, grouped under the bar spacing of the series | Deeper beats thicker; spacing decides how many bars share the load |
| Cell value = allowable load | Uniform (UDL) or concentrated load permitted at that span | Know which family the cell belongs to before comparing sheets |
| Footnote = deflection basis | The deflection limit the whole sheet was computed to | Two suppliers, two bases, different numbers for the same panel |
| Header = construction type | Welded, press-locked or riveted panels carry load differently | Tables are per construction — never mix W and P values |
Why we explain the format instead of publishing numbers
A single "grating load table" pasted on a page would have to hide its inputs: bar section, span, spacing, deflection limit, construction type. Hide any one of them and the number is unsafe to build on — a looser deflection basis can inflate every cell in a sheet without changing the panel at all.
So this page teaches the format, and the compiled tables travel with your quote: one sheet per bar section we weld, span by span, both load families side by side, deflection basis stated up front. If you already work in one designation, the 19W4 load table page applies this same method to that series.
Three checks before you trust a cell
How to Read a Grating Load Table Safely
Most selection mistakes are not arithmetic — they are reading errors. Run these three checks, in this order, on any steel grating load table before a single panel is ordered.
1 · Read the deflection criterion first
Before any cell, find the footnote. The deflection limit is chosen by the project — a mezzanine, a catwalk and a vehicle crossing accept different sag. A sheet with no stated basis is a sheet you cannot compare with anything.
2 · Match the load type to the traffic
Foot traffic and stored goods are uniform load, spread per unit area. A forklift wheel or a pallet foot is a concentrated load, tabulated at midspan where it bends the panel hardest. Know which one your duty really is — then check both.
3 · Confirm the basis: units, bar, construction
Metric or imperial, per m² or per square foot, welded or press-locked — a number read off the wrong basis is worse than no number. Check that the column's bar section and the header's construction type match the panel you are actually buying.
Fix your span
Measure support-to-support along the bearing bars and find that row.
Check both load families
Compare uniform and concentrated values against your duty — the lower margin governs.
Move the bar section
Step to a deeper or thicker bearing bar until both checks pass at your deflection basis.
Rather calculate than read? Run your span and load through our load calculator — same inputs, same 24-hour engineer review.
Why engineers ask us for data
Free Load Table Help, Verified by the Factory That Welds the Bars
Free load table support
Charts, specs and drawings, free — the reading guide above is open to everyone, and the compiled tables for our full bar range arrive with your quote. No drip campaign, just the data.
By factory engineers, verified
Tables compiled to the MBG 531 reference practice and checked against bars we weld daily — not reseller copy-paste. Send your span and an engineer, not a chatbot, replies.
Made simple, delivered by email
Span, load type, bar section. If a table needs more than three steps to read, it was written wrong — our sheet keeps the layout explained above and lands in your inbox with the 24-hour quote.
Applications
Where a Grating Load Table Decides the Spec
Same table, different governing column. These are the four duties where knowing which load family rules is the difference between right-sized and over-sized.
Platforms & mezzanines
Uniform load usually governs — stored goods and foot traffic spread across the panel area.
Vehicle crossings & ramps
A wheel at midspan is the concentrated family at its worst — forklift routes are sized from that cell.
Long-span walkways
At long spans one person with tools can govern — check both families even under light traffic.
Stair treads
A point load at the nosing — tread data is tabulated separately from flat-panel load tables.
Specifications
The Range Behind Our Load Tables — What We Actually Weld
| Parameter | Range |
|---|---|
| Panel family | Welded, press-locked and stainless panels — one table format |
| Bearing bar | 20×3 mm to 100×8 mm, plain or serrated |
| Bar spacing | 30 / 40 / 60 mm centers |
| Cross bar | Twisted square or round, per specification |
| Panel width | Up to 1.25 m |
| Panel length | Up to 6 m |
| Materials | Q235B carbon steel · SS304 / SS316 stainless |
| Surface | Black or hot-dip galvanized (ASTM A123 / ISO 1461) |
| Load table sheet | Provided with your quote, per bar section and deflection basis |
What we provide, and how it reaches you
We compile grating load tables for the range we actually weld — bearing bars from 20×3 mm to 100×8 mm at 30/40/60 mm spacing — to the MBG 531 reference practice. The sheet is provided with your quote, because every cell depends on the deflection basis only you can confirm for your project.
- Send span, load and deflection basis — engineers reply within 24 hours
- One sheet per bar section, both load families side by side
- Sample panels in 5–7 working days to verify the choice on site
Standards & compliance
Tables Compiled to Recognized Practice — Documents on Request
ANSI / NAAMM MBG 531
Load tables and panels produced to the MBG 531 reference practice — span rows, bar-section columns and the deflection basis stated up front on every sheet.
ASTM A123 / ISO 1461 HDG
Hot-dip galvanized finish for outdoor duty, with coating thickness checked by sampling on every galvanized batch before panels are released.
CE & SGS tested
Certified & tested, reports on request. Mill test certificates to EN 10204 Type 3.1 and the factory inspection report travel with every order.
From table to order
Three Steps From a Span to a Shipped Panel
Send span, load and deflection basis
Or just the drawing — panel sizes, bar spec, quantities. Drawing review is free and happens inside the quote window.
Quote within 24 hours, table attached
Itemized, FOB Tianjin as standard — EXW or CIF on request. The load table sheet for your bar section comes with it, plus the size we recommend.
Samples in 5–7 days, production in 15–25
Working days after drawing confirmation, hot-dip galvanizing included. Installation drawings and fixing layout ship with the order.
Free data, then a quote
Get the Grating Load Table
Send your grating load table questions — factory reply in 24 hours. Ask for the sheet in the message field and it arrives with your quote.
- Full sheet: every bar section we weld, span by span, both load families
- Deflection basis stated, so tables from two suppliers compare fairly
- Factory audits welcome — see the lines before you commit
Prefer to talk? WhatsApp us or sales@dtsteelladder.com
Request the table sheet
Five fields — we do the rest.
FAQ
Frequently Asked Questions
What is a grating load table?
A grating load table lists how much load a panel can carry. Rows are the clear span between supports, columns are the bar section and spacing, and each cell gives the allowable uniformly distributed or concentrated load for that combination. Every table also states a deflection basis, because the allowable load changes with the deflection limit the values were computed to.
How do I read a grating load table safely?
Check the deflection criterion first, then the load type. Wheel loads and pallet feet act as concentrated loads at midspan, while foot traffic and stored goods spread as uniform load, and a panel must pass both checks at your span. Also confirm the units and the construction type, because welded, press-locked and riveted panels carry load differently and their tables are not interchangeable.
Can I download your grating load tables?
Yes. The tables are provided with your quote rather than published as fixed numbers, because allowable loads depend on span, bar section, spacing and the deflection limit you specify. We compile them for the range we actually weld, bearing bars from 20×3 mm to 100×8 mm at 30/40/60 mm spacing, and the sheet arrives with your 24-hour quote.
Related pages
Related Specification & Calculation Pages
19W4 Load Table
The designation-specific sheet for the 19-series — same reading method, fixed bar spacing.
View page →Grating Maximum Span Length
How far a panel bridges between supports before the next bar size is needed.
View page →Bar Grating Weight Per Square Foot
The weight side of spec work: area × steel, per square foot and per m².
View page →Grating Load Calculator
Run your span and load through a calculation instead of reading a static table.
View page →How To Calculate Grating Load
The method behind the cells — from load case to required section, step by step.
View page →Grating Deflection Calculator
Sag under load — compute it for your span before you fix the bar size.
View page →